So, you have that space in your backyard that you fertilize and water and mow. It gets good sunlight, drains well after a good rain, and is out of the way. However, you are really tired of repeating that process, but you do not want another flower bed to keep up. What to do?
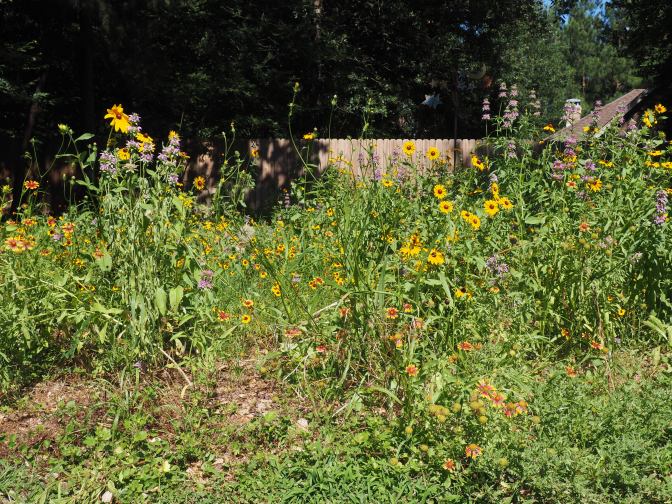
That is a perfect spot for a pocket prairie. What is that? A pocket prairie is a space that you convert back into a natural landscape that includes native grasses and wildflowers. Before we arrived, the land was covered by indigenous plants that thrived because, well, they belonged there. Over the decades we plowed up, re-seeded, and cultivated non-native plants that were needed to sustain livestock and/or profitable crops. And, that was OK. When you know better, you do better. So, why not reclaim that bermuda/san augustine/weed area and transform it into prairie land once again.
Naturally, prairies contain about 70% grasses and 30% wildflowers. For a pocket prairie just reverse that making covering it with 60-70% wildflowers and 30-40% native grasses. You can spread seed in spring or fall. A good time to seed is spring or late summer, but no less than eight weeks before the average frost date. This gives the seeds enough time to germinate and establish a root system. Of course, spring gives you a longer growing season, but the wildflowers may not bloom until next year. Seeding in the fall finds the ground still warm from summer.
How to do that? It is an easy three-step process: 1. remove the existing ground cover; 2. select and spread native seed; and, 3. water well. Let’s take a look at each step in a bit more detail.
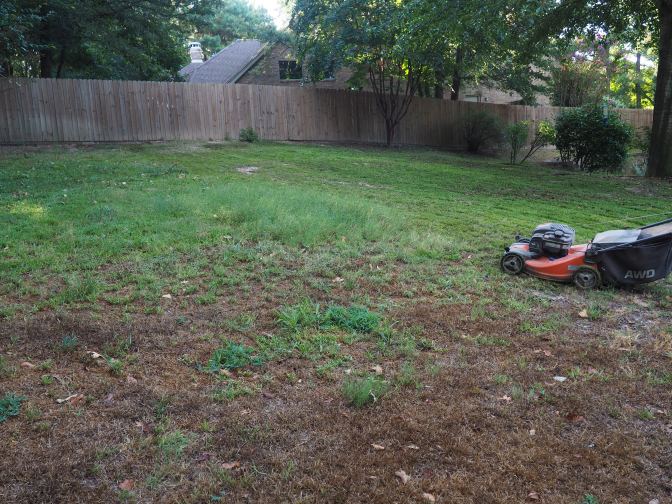
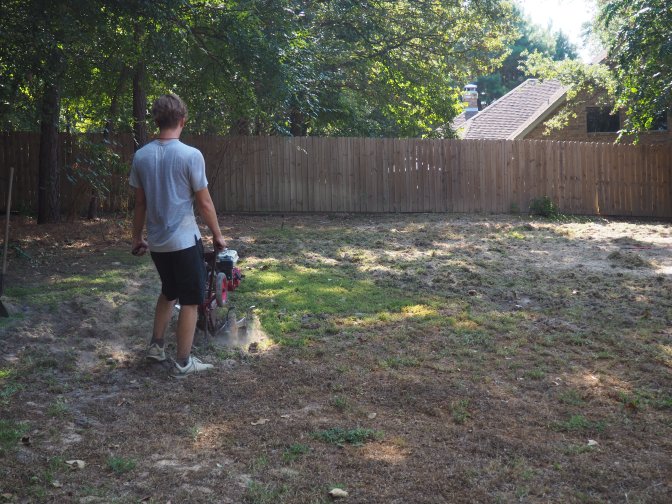
Step 1: Remove the Existing Ground Cover.
To get the best bed for your re-seeding, you need to remove whatever is there. If you do not, the seed will compete with already established ground cover. You can apply an organic herbicide, but that could involve three or four treatments. A good way of removing ground cover is to till it up. You do not need to dig up six-inches of soil. This is not a vegetable garden. Till it up about an inch or so, just enough to loosen that layer of ground cover so that it can be pulled up and removed. If it is weeds, bag it and ship it off. If it is grasses, put it in the compost pile to add that good nitrogen.
Step 2: Select and Spread Native Seed
If you do not know what native grasses and wildflowers to get, not to worry. There are several resources available to you. The Lady Bird Johnson Wildflower Center website (https://www.wildflower.org) offers a search engine by plant variables, i. e., type, height, light and soil moisture requirements. If you really do not want that much detail, search their seed supplier list (https://www.wildflower.org/suppliers/). Or, you might try the National Wildlife Foundation website (https://www.nwf.org/NativePlantFinder/) for a listing by zip code. All of the suppliers offer native grass and wildflower seeds, or, you can get specialty plants for immediate gratification. Any of these businesses will consult gladly with you on the best selection.
You are now ready to spread the seed. If your area is small (<300 sf), scattering works well. Hand seeding is easier if you mix the seed with a bulking agent (e. g., kitty litter or sand). To improve uniformity of seed placement, divide the seeding area into quarters and hand cast the seed in two directions with a sweeping motion. Follow up with a light raking or rolling to achieve good seed-to-soil contact.
For larger areas (>300 and <600 sf) use a broadcast seeder. You may already own one to fertilize your yard. It is a hopper with a regulating system in the bottom that feeds the seed either onto a spinner that slings it out or drops it directly onto the soil. Again, some seeds have difficulty getting through the regulating mechanism, so use of a flow-enhancing material (kitty litter or sand) mixed with the seed to aid in uniformity and tp help the broadcaster handle the seed. Spread half of the seed in one direction and the remaining seed perpendicular to that. Follow up with a light raking or rolling to achieve good seed-to-soil contact.
If your area for a pocket prairie is greater than 600 square feet, then I assume that you are a farmer and already know what to do.
Step 3: Water, and Water Well
If your area slopes, and there is a chance that a good rain will wash the seed away, you can cover it with an erosion control blanket like Curlex, an aspen wood fiber designed to shield the topsoil from water and wind erosion. Check with your local nursery for suggestions. It also works well on flat ground to control evaporation.
You need wet seeds. For good establishment you should water daily for about 8 weeks (twice a day if it’s windy). begin with a light sprinkle just enough to keep the top from drying out. Then once the seeds have sprouted, you can slack off to every other day increasing the watering depth and ending up with every three days. After that, you water whenever the plants look stressed, especially if you want flowers.
Congratulations! Not only did you restore your small plot to its once natural beauty, but you established a pollinator garden and a wildlife habitat. Expect to see butterflies and hummingbirds, squirrels and bees, and beautiful flowers. Be sure to add a water source, be it a bird bath or a mud puddle, for all critters need water as well as the food sources from your newly established Pocket Prairie.